Fitting a Modified Heater Air Intake Box
Reproduction in whole or in part of any article published on this website is prohibited without written permission of The MG Car Club.
by Colin Grant
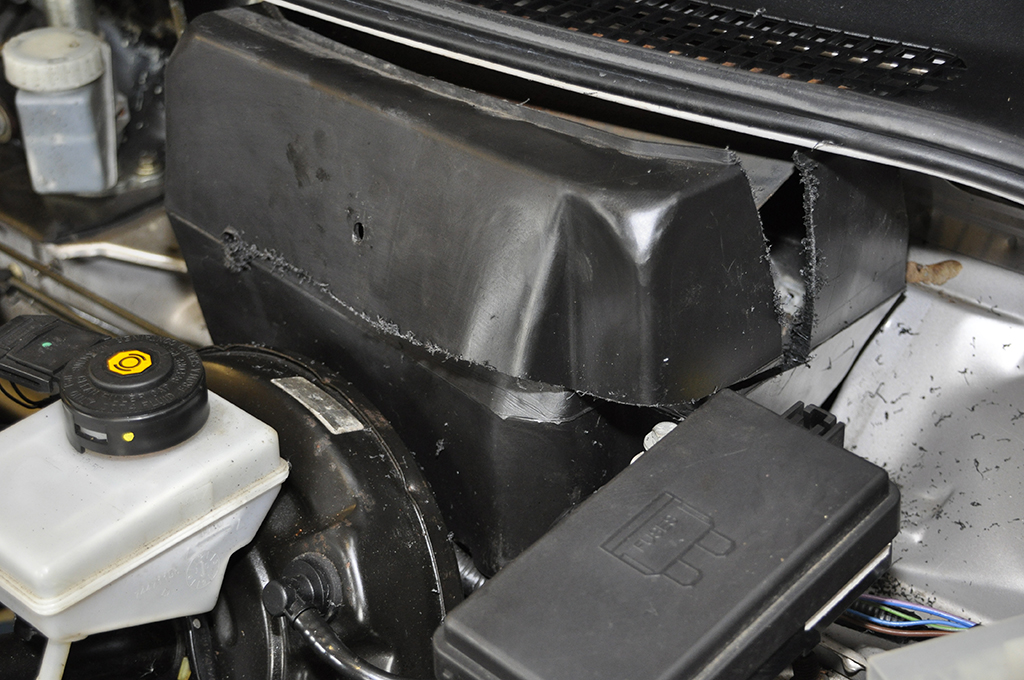
Like me, many of you spend hours cleaning and polishing your cars. But something that really spoils all the effort on an F or TF is an unsightly rusty heater air intake deflector plate. This plate on the earlier air intake boxes, up to 2003, is there to deflect rain water away from the air intake to the heater and into an area of the box which then allows the water to drain away. Problems arise when the seal around the base of the intake box fails, allowing water into the passenger compartment. Early Fs were quite prone to this, which was down to the type of seal being used. This was modified around 1998, but did not create a complete solution to the problem.
The intake box can be removed/replaced as described below but this is severely hampered if you have aircon fitted, as the aircon has to be de gassed before removing the evaporator unit that sits in the passenger footwell.
If you only wish to paint your rusty deflector plate you can remove the plastic trim from the front scuttle and get to most of the plate to rub it down and repaint. What you can’t do is easily remove the heater air intake box to paint the plate, as it was fixed to the car before the brake servo was fitted and the only way to remove it is by cutting the outer housing to allow room to remove it.
The solution I chose for my car was to fit a modified unit as fitted to the later TFs. The modified box is a much simpler design and has no deflector plate to rust. I purchased the modified unit from Brown & Gammons and below is a photo sequence on the procedure I used to fit it.

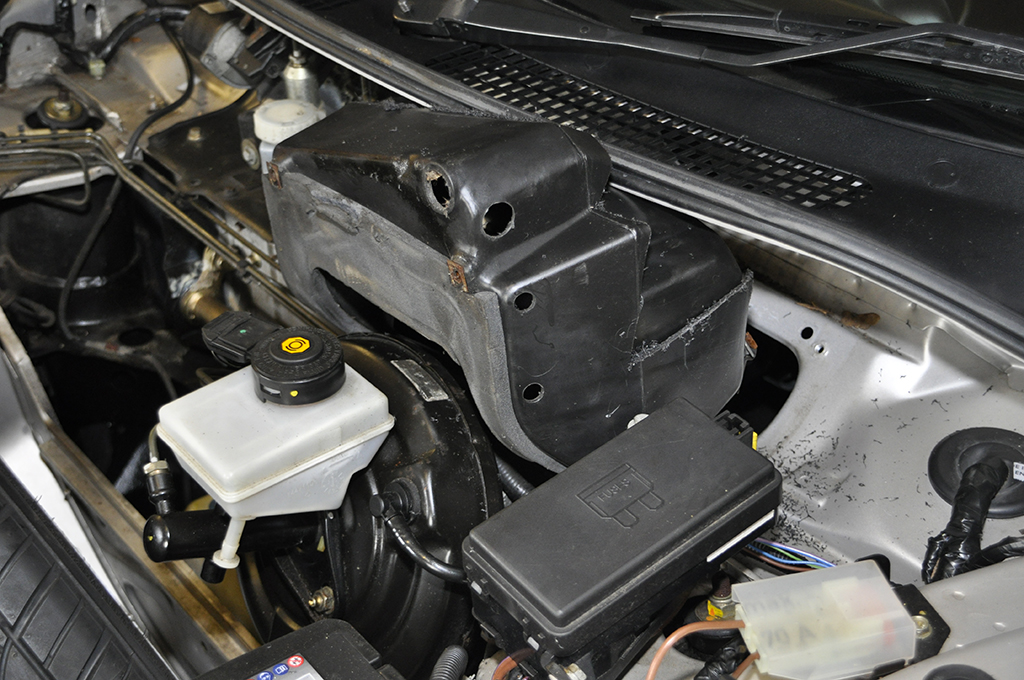
1. Old intake box showing the rusty deflector plate.
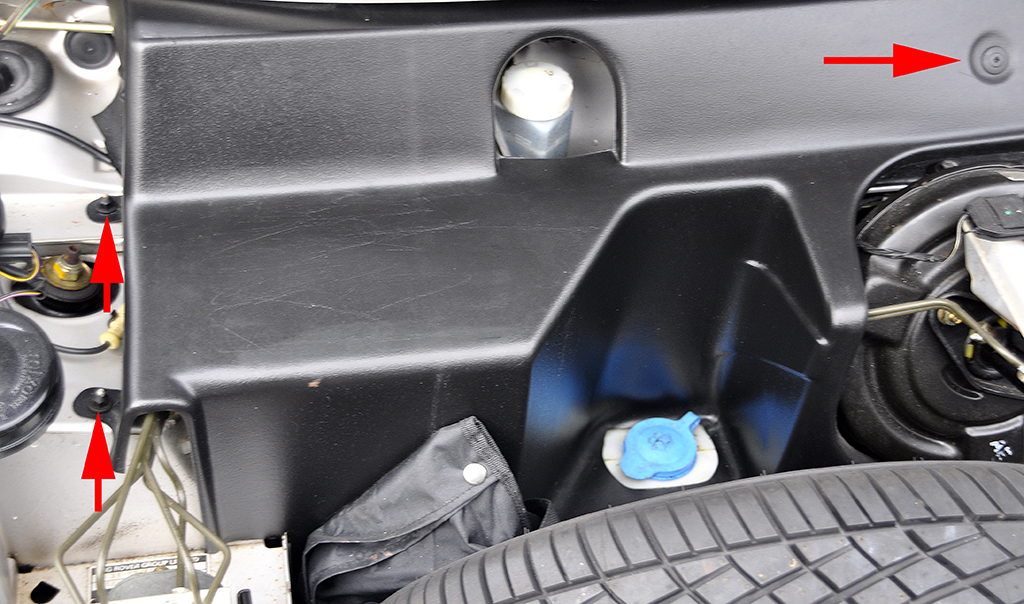
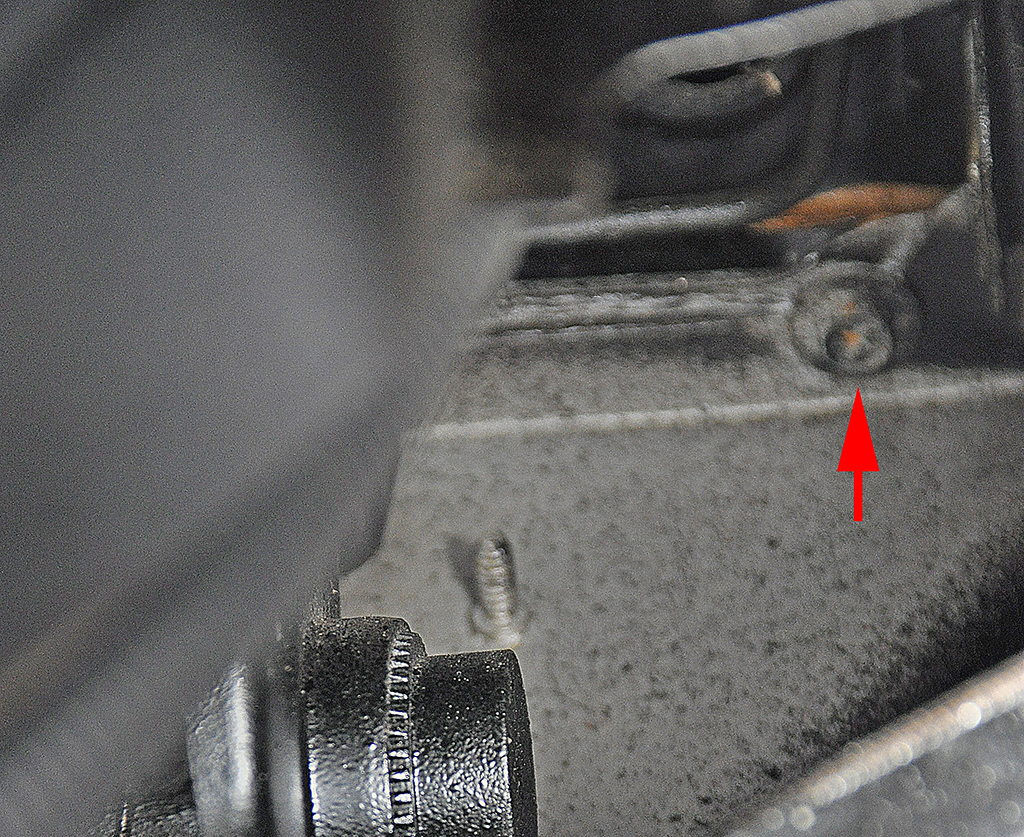
2. First remove the black cover by undoing two 10mm plastic nuts and a plastic screw, arrowed.
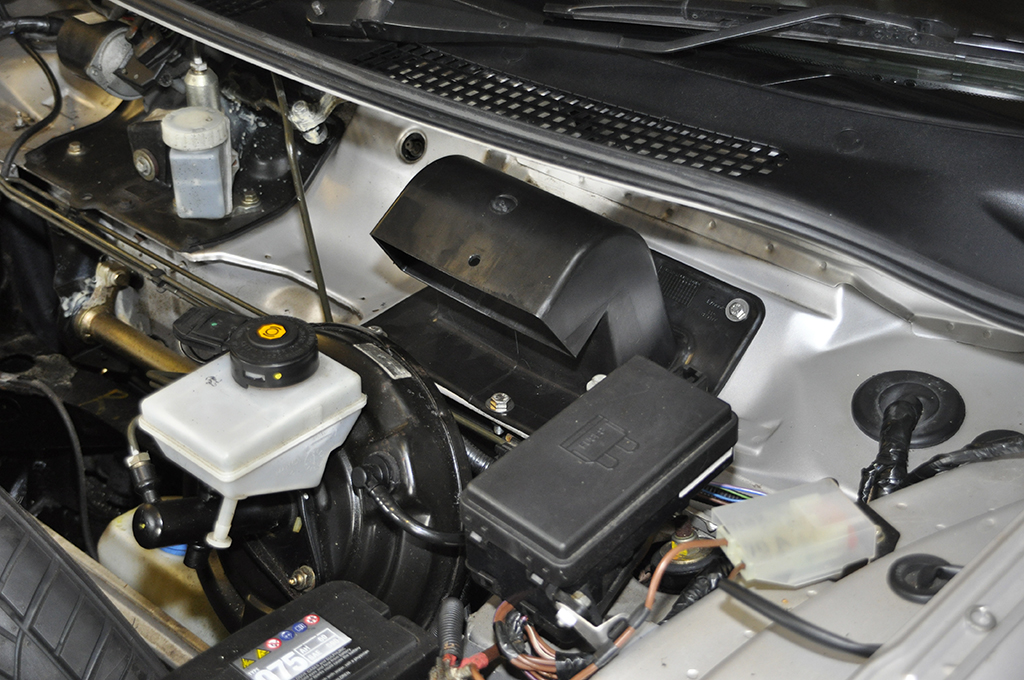
3. This reveals the air box
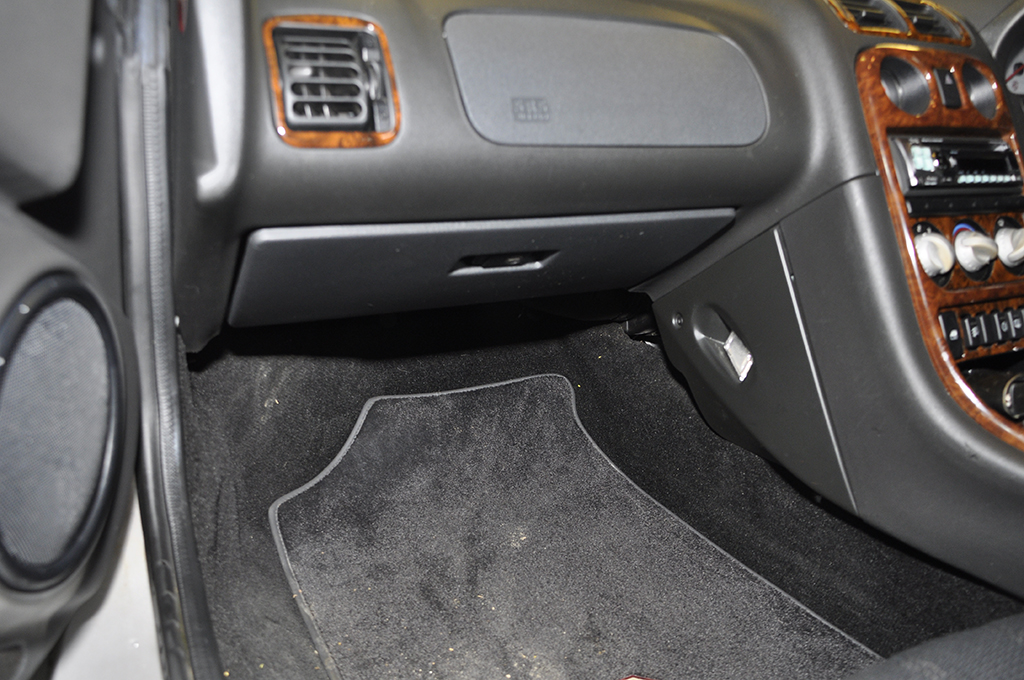
4. Next the glove box has to be removed
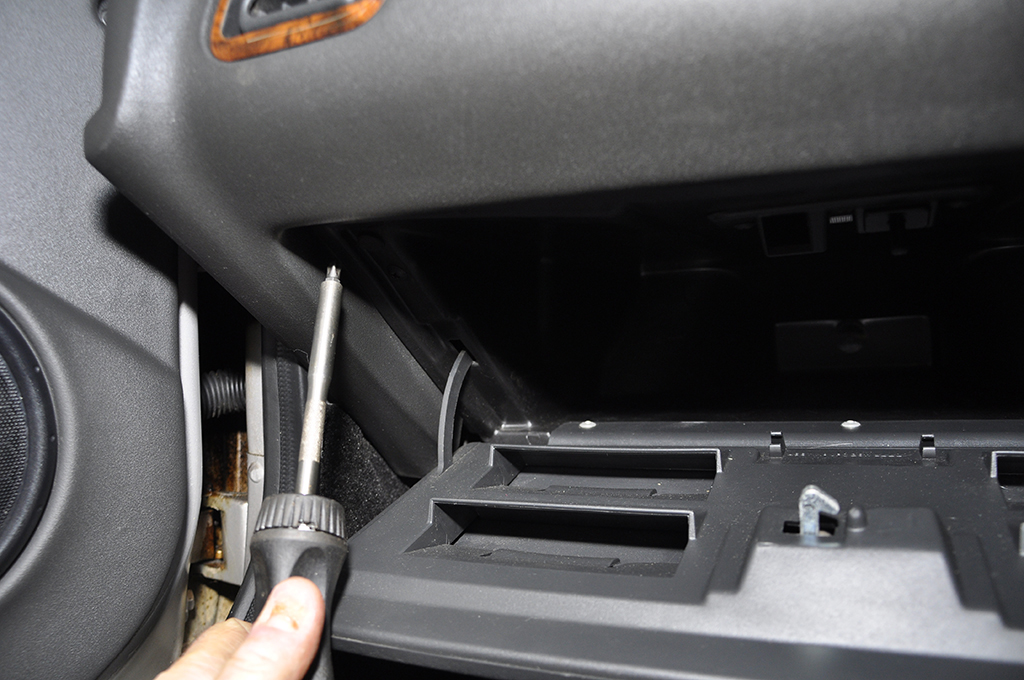
5. Undo two black cross head screws either side of the open glove box
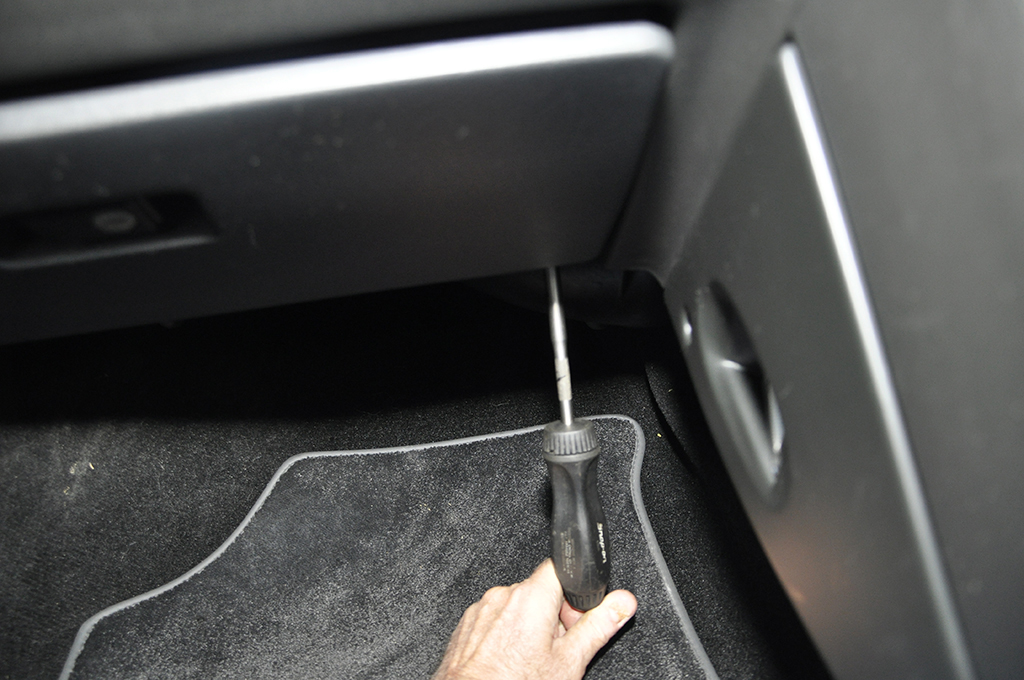
6. Close the lid and loosen the two rear cross head screws
7. Pull the box towards you and remove the four electrical connectors, for the light switch and bulb.

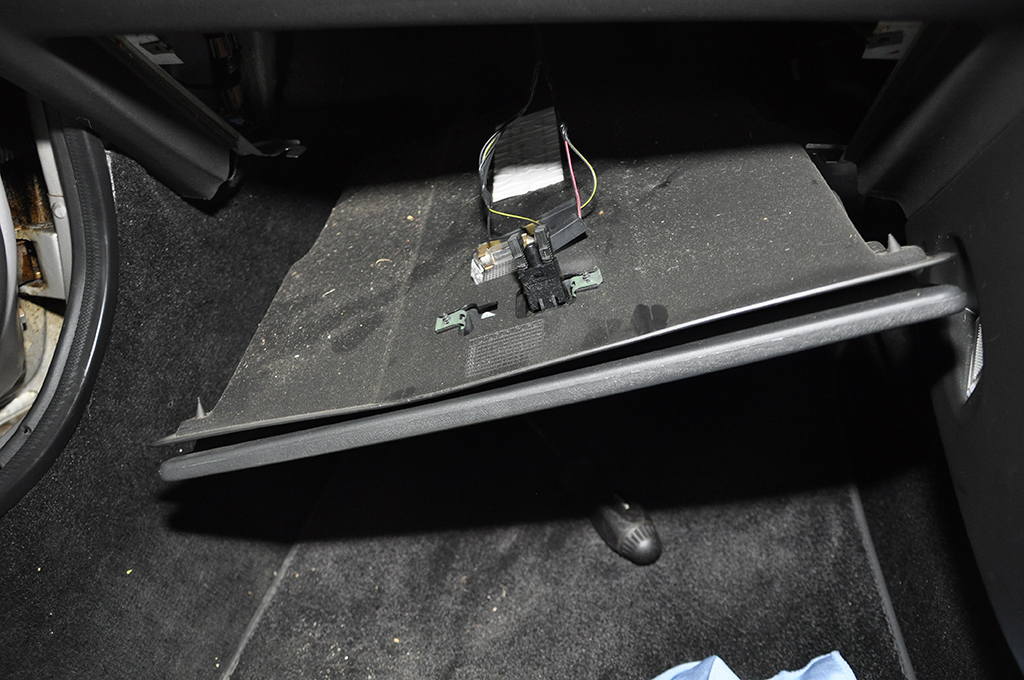
8. Then with the glove box placed out of the way remove the 10mm nut (arrowed) from the air intake ducting and remove.
9. This then reveals the underside of the air intake box. It can be seen that the seal on this box had not leaked. Next undo the black hex head self-tapping screw, arrowed, and the screw from the opposite side behind the trunking.
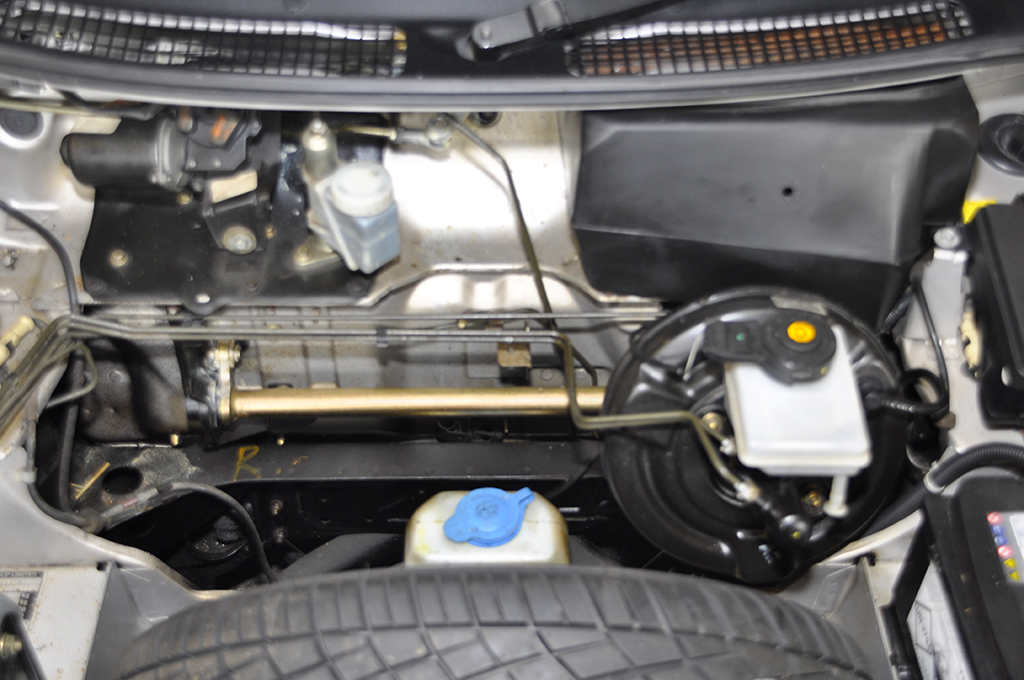
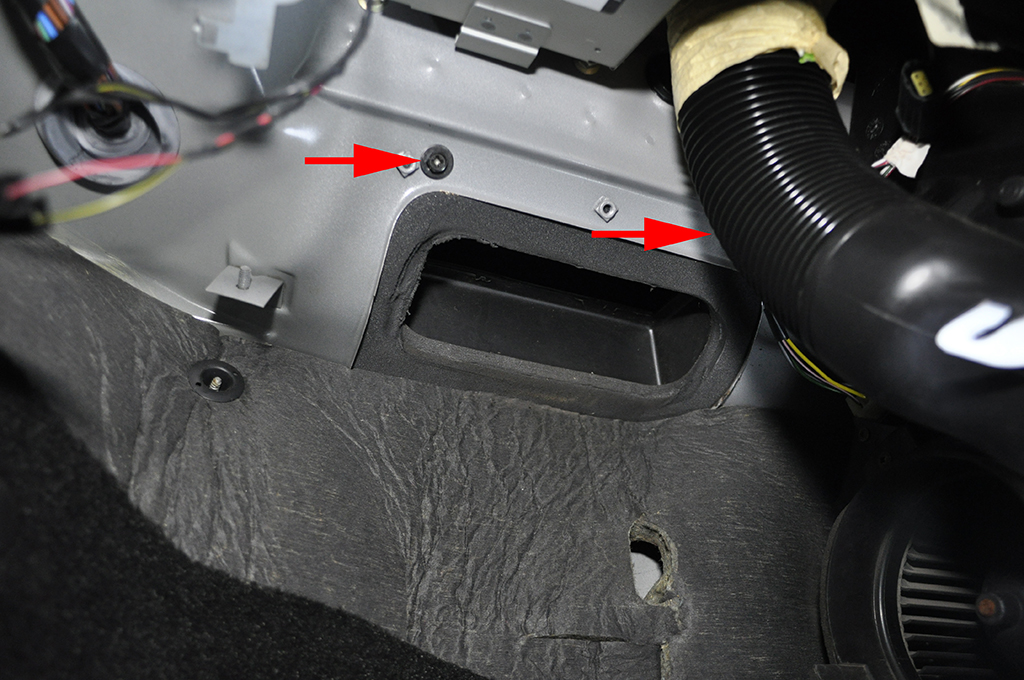
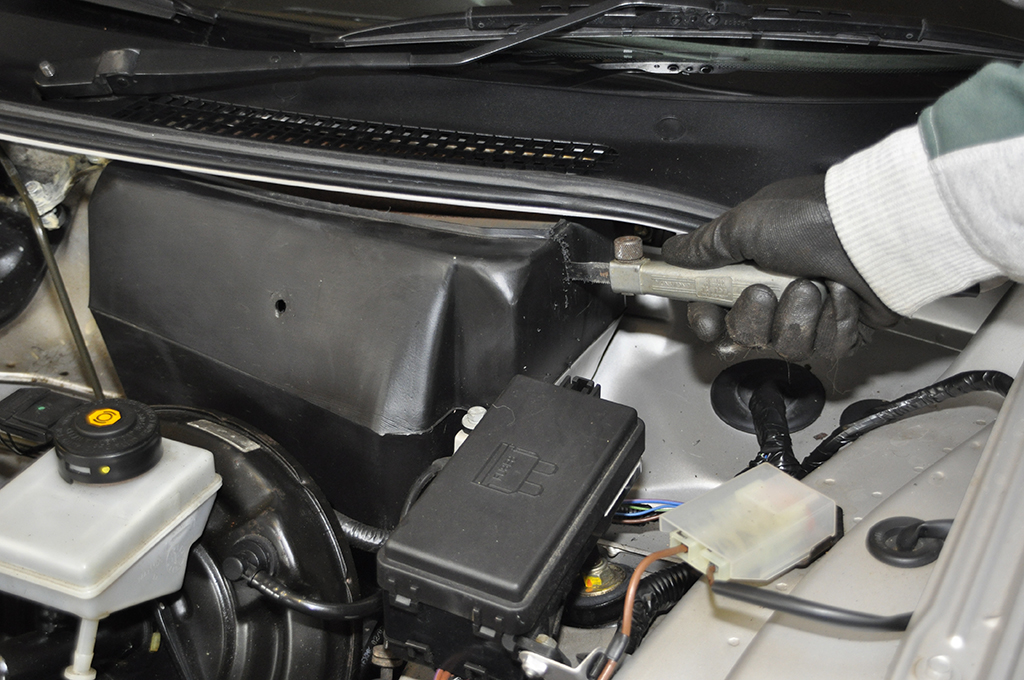
9b. Then from under the bonnet undo the self, tapping screw on the front left underside of the air box. This has a hex head and can be undone with a socket as shown.
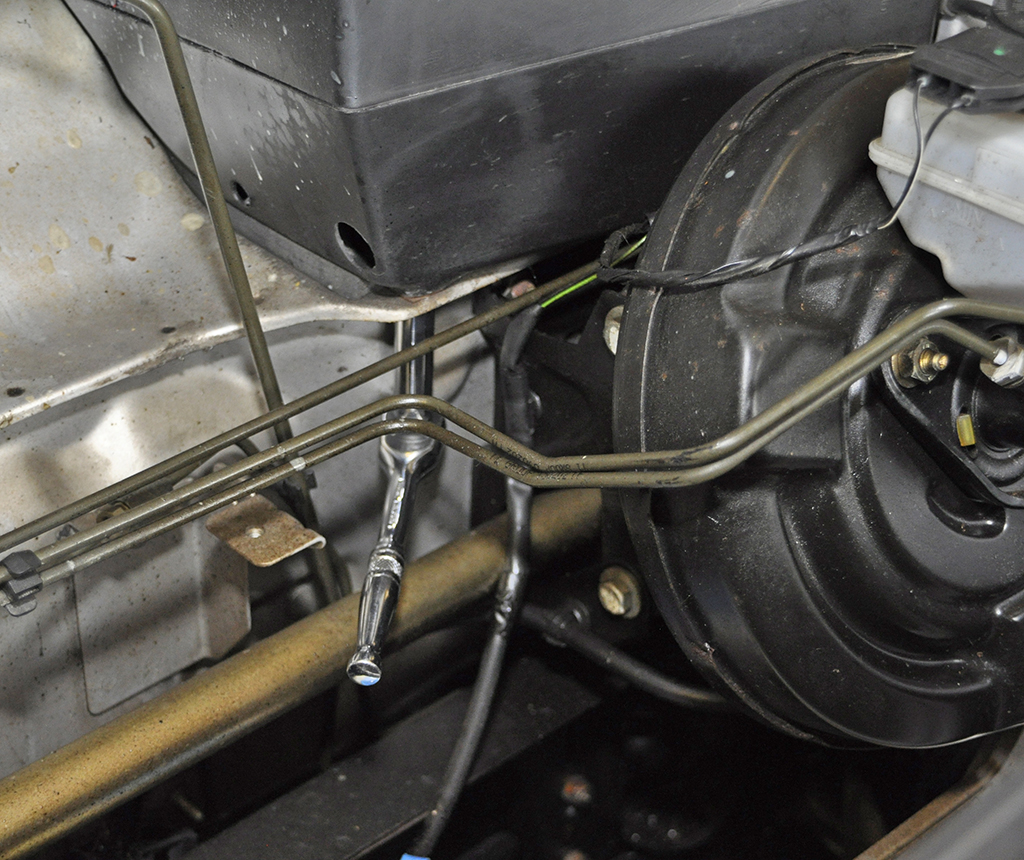
9c. Next jack up the front of the car and support on axle stands. From the underside of the car undo the self-tapping screw, arrowed, on the right front side of the air box.
9d. Then with a hacksaw blade in a holder cut down to the ridge in the intake box.
9e. Then drill a hole in the front of the box just above the ridge, and place the hacksaw blade in the hole and cut along the ridge, to meet up with your first cut.
9f. Push the cut portion into the box which then allows just enough room to twist upwards and out of its position.
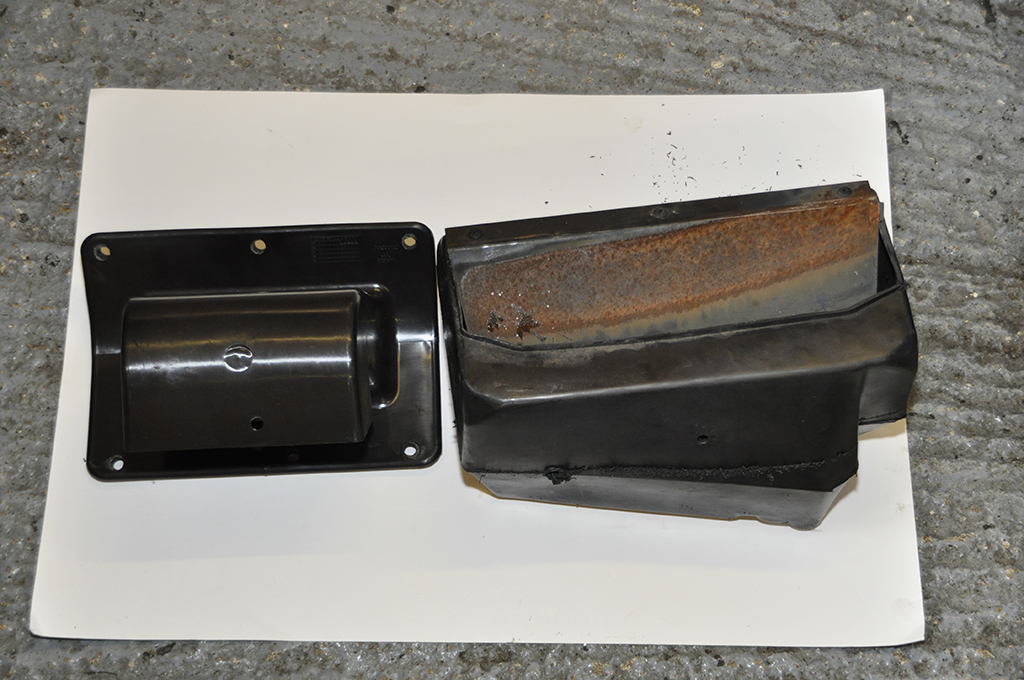
9g. You are then ready to fit the new box. Above old and new air intake boxes compared.
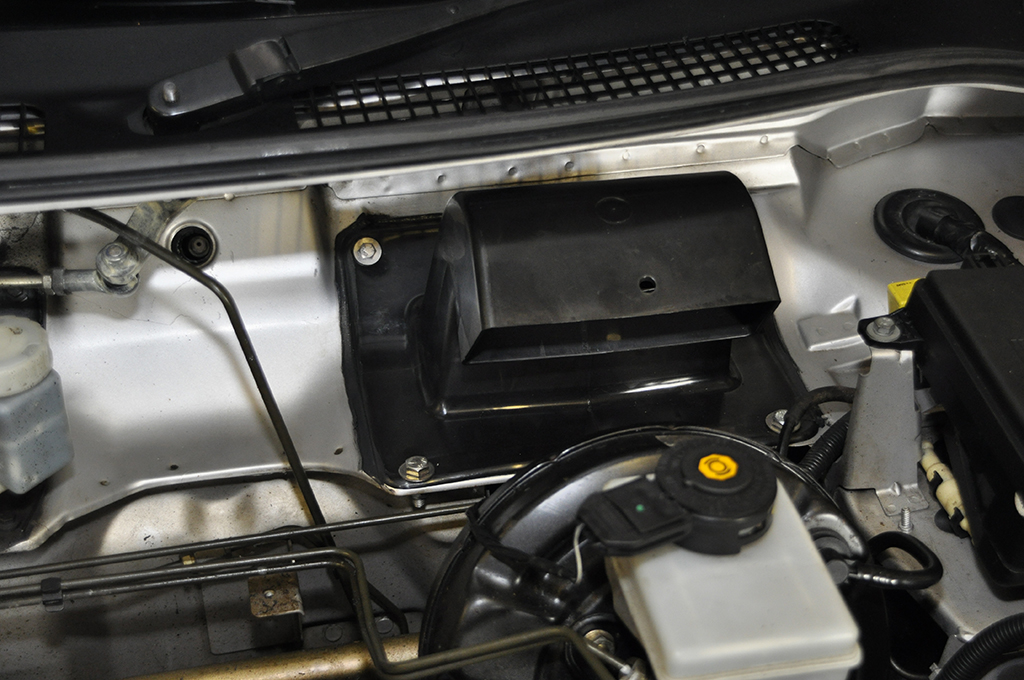
9h. New air intake box in place. The three holes in the rear of the unit match up with three captivated nuts already in place so you simply have to fit and tighten with new M6 fixing bolts and suitable washers. Don’t over tighten as this can distort the plastic base.
9j. To locate the front of the box you will need two bolts/washers and locating nuts. With the new box fixed in place I put a bead of sealant around its edge.
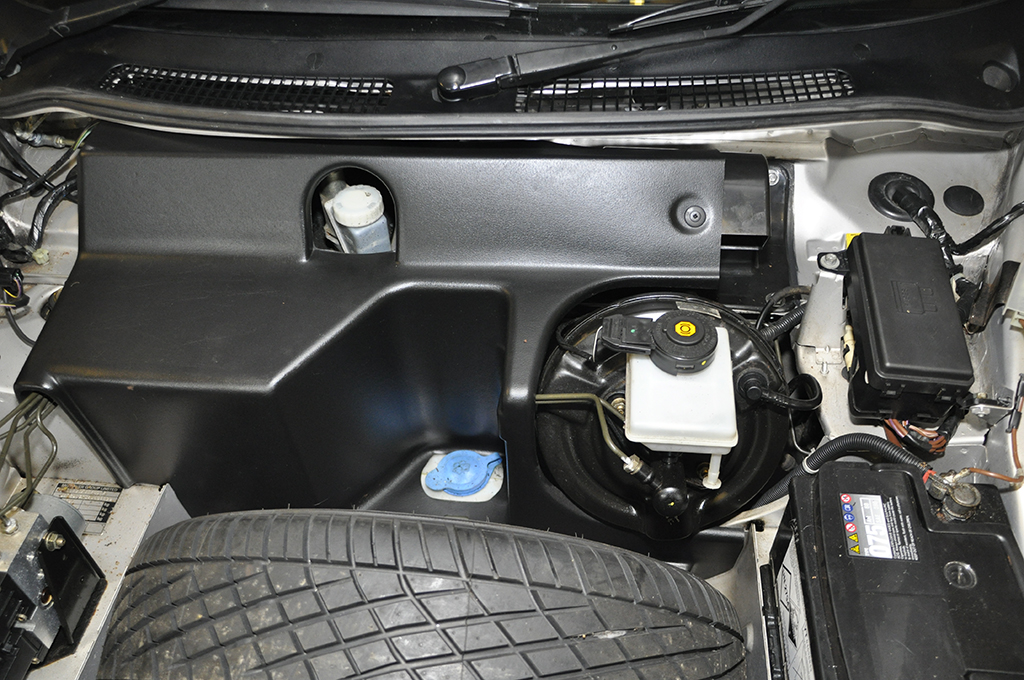
9k. All that remained was to replace the black cover and admire the much improved box
The air box can be obtained from Brown & Gammons. The part number is JKA000120 and is priced at £34.95 plus £4.95 post and packing. Contact Brown & Gammons on 01462 490049 or visit their web site at www.ukmgparts.com
This article was written for the January 2013 issue of Safety Fast! so all prices and availability of parts were correct at that time.