Full Throttle
Reproduction in whole or in part of any article published on this website is prohibited without written permission of The MG Car Club.
By Colin Grant
If you own an MGF built before 2000, the chances are that the car is still running on its original SU plastic 48mm throttle body. You may be experiencing erratic tick over, or uneven running, which takes the joy out of driving your ‘F’. If the normal solutions have not worked such as dismantling and cleaning the throttle body, cleaning out the idle control air inlet pipe etc then a remedy is at hand in the fitting of a Dell’Orto metal bodied 52mm throttle body. This not only does away with the various issues mentioned but gives you a low down power increase as well. I’ve just recently fitted one to my 1997 VVC MGF and the difference has been amazing. The cost of the body is around £100 to £120 via Ebay or your local specialist. Like me you can save the cost of fitting by doing the job yourself, it takes around an hour
Tools you will need:
1 x Flat bladed screwdriver
1 x 8mm ratchet spanner
1 x 8mm/10mm socket, extension and ratchet
1 x 10mm ratchet spanner
1 x Needle nose pliers
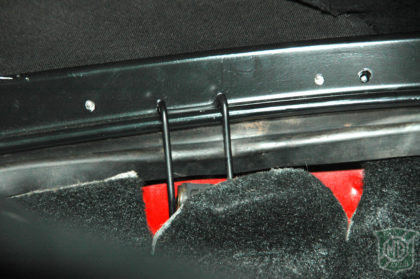
Firstly if you have a hardtop fitted you need to remove this by undoing the four latches and disconnecting the heated rear window connector. Ask a friend to help you lift this off. Next, the fabric hood has to be in the up position. Sitting in the car turn to the rear parcel shelf and undo the five clips securing the rear of the hood to the car as shown.
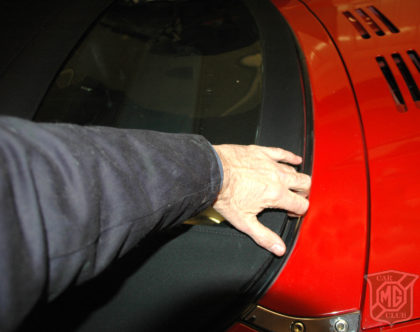
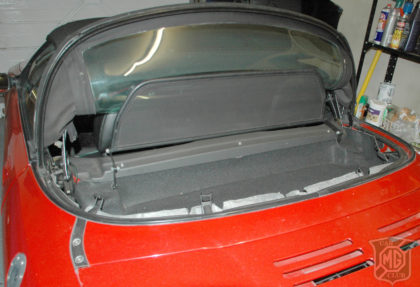
Once all the clips are released go to the rear of the hood and pull it upwards and, if fitted, pull up the windbreaker which should hold the hood up out of the way. If not secure with bungee hooks or similar.
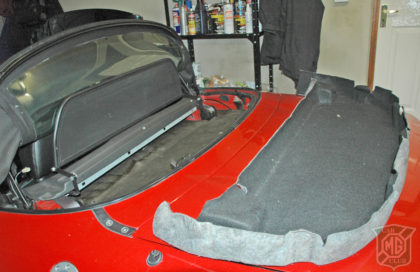
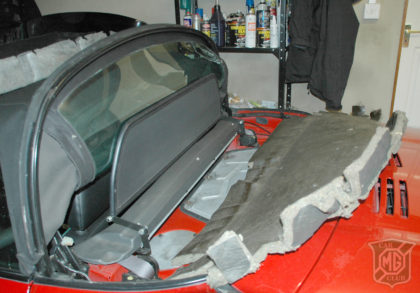
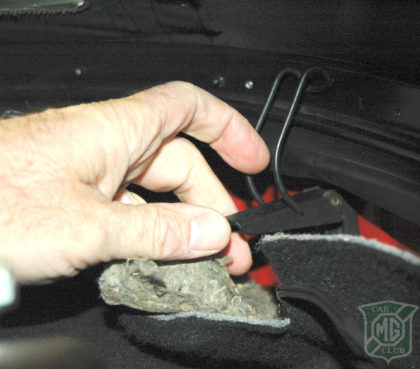
With the hood out of the way you can see the carpet, which needs to be removed by simply pulling it away from the rubber surround and lifting out. Sometimes the felt backing is stuck to the carpet so comes out as one piece but the one shown in the pictures came out separately.
Underneath the carpet and sound deadening felt you will see the engine cover. There are eleven 10m bolts which hold this in place and have to be removed. Once the bolts are removed the engine cover can be lifted out and the engine exposed.
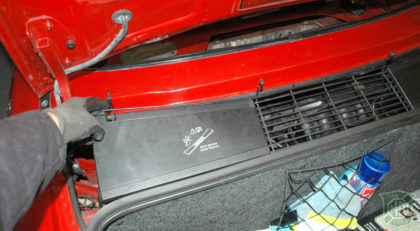
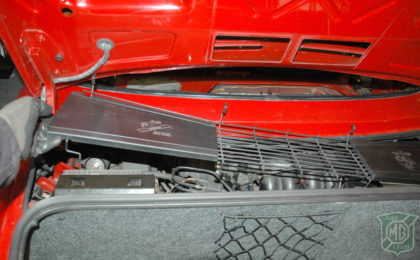
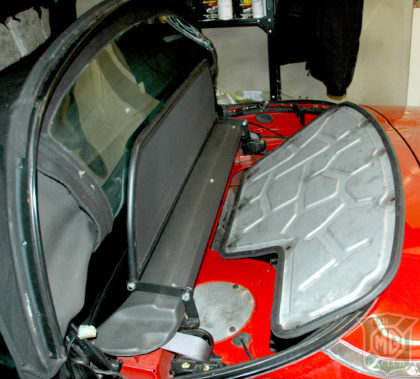
Now remove the metal grid that covers the engine bay in the boot. You do this by unclipping it at the front and just lifting away, as shown in the picture.
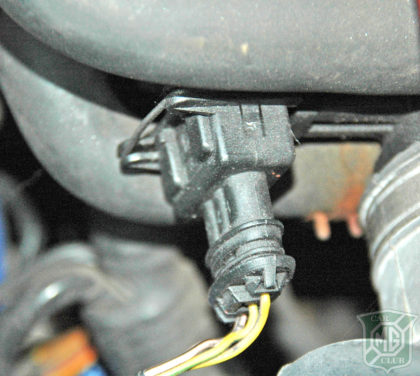
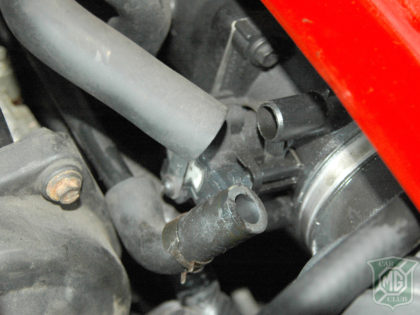
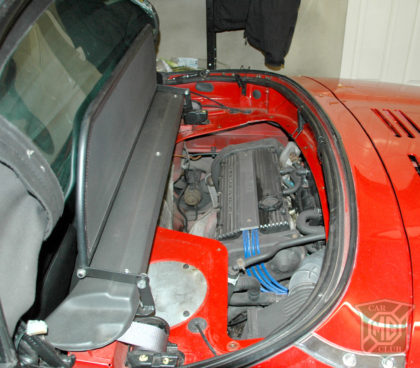
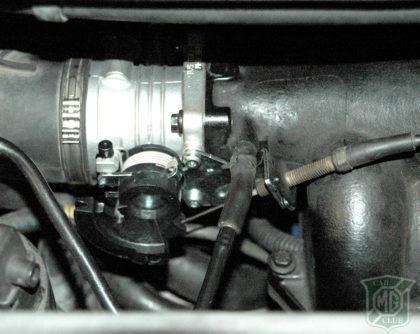
Looking through the inspection hatch above the engine, locate and disconnect the connector to the throttle position sensor which is attached to the throttle body. Now disconnect the rubber hoses leading to the throttle body There are two hoses one being the oil breather (lower) and the idle air control hose (upper) as shown.
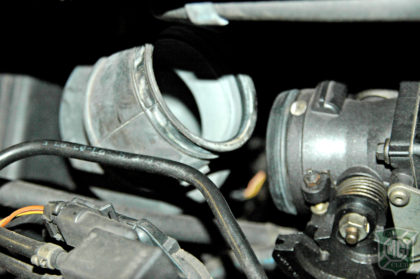
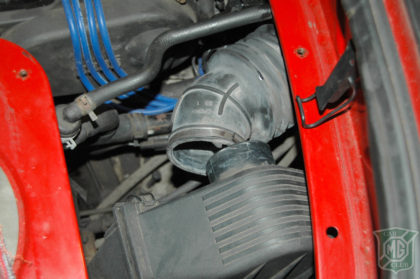
Remove the air hose by gently prising apart the retaining clip with a screwdriver. Many of these clips are damaged and jubilee clips are used in there place, but if care is taken they can be reused. Jubilee clips have been known to distort the plastic body from over tightening causing erratic tick over due to the butterfly sticking.


With your 8m ratchet ring spanner, and 8m socket ratchet remove the four bolts holding the throttle body in position. This can be accessed through the boot inspection hatch. I did find that the fourth lower bolt on the rear of the throttle body was easier accessed through the engine panel using a ratchet.
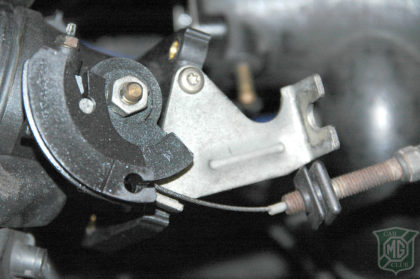
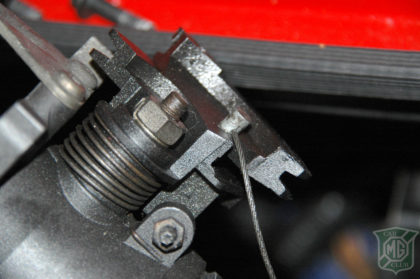
Holding the throttle body in your hand unclip the cable which just slides off the body and unhook the cable. The body can now be removed from the car.
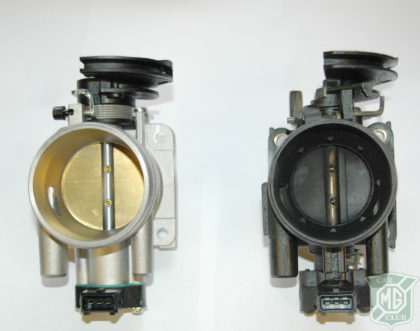
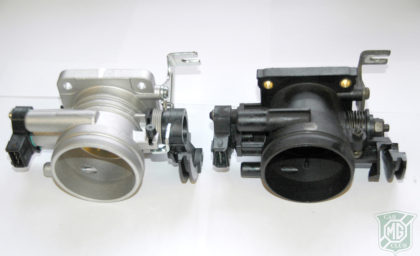
The two throttle bodies can now be compared side by side. Fitting the replacement is just a reversal of the removal procedure.
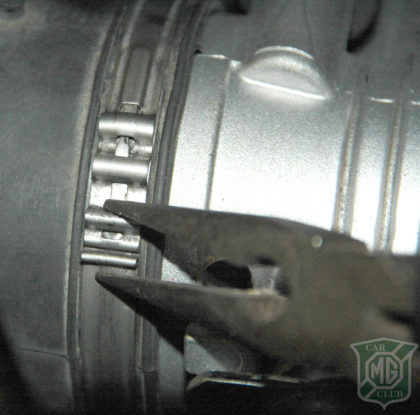
The clip mentioned earlier which holds the rubber air intake hose can be reused by using a pair of needle nosed pliers, pulling the clip together and pushing it in to lock. Once fitted stand back and admire your shiny new metal throttle body.
Before starting the car you will need to set the throttle position sensor. This is done by turning on the ignition (position ll) and pressing the throttle pedal fully down five times in 20 seconds, and then switch off for ten seconds before starting. This resets the baseline throttle position sensor reading in the engine management system. Start your engine and take it for a spin.
You will find a much sharper throttle response giving a real surge when accelerating. You will also find, as I did, any jerkiness using the plastic body was now gone with an overall smoother response. If you should find that the tick over is too high or too low once warmed up you will need to take it along to your local MG specialist to have it set up on their service/ fault diagnostic system called Test Book. Don’t be tempted to fiddle with the settings yourself.
Was it worth it, you bet!
How does a throttle body work?
In some respects the throttle body is similar to the carburettor in that it consists of a body in which a hinged flap or butterfly is fixed. This acts as a valve to regulate the quantity of air passing through. But unlike the carburettor the throttle body does not regulate fuel this is done by the injectors. The more the butterfly is opened the more air is allowed to flow through.
The body is operated by a cable being connected by a cam on the side of the throttle body. On the other end of the butterfly shaft is a throttle position sensor abbreviated to TPS. This is a potentiometer and provides the engine management system with information regarding the position of the throttle. This information is vital for the fuelling and ignition mapping of the engine.