My 1949 MGY Type Saloon – Part 1
By Neil Wakeman
One of the problems for the owner of an MG Y is to explain to people what a Y is – it seems that everybody is familiar with the open sports MGs, which is quite understandable, given the immense popularity of these lively little sporting cars over many years, but very few people can recall having ever seen a ‘closed’ MG, even though the company has made many very stylish saloon models since 1924.
Motor historian Anders Ditlev Clausager writes, in the introduction to his book ‘MG Saloon Cars’: “If there is a common bond between the very different (ie saloon) cars described in this book, it is that they have always had more scorn than praise heaped upon them. They have often been misunderstood, misjudged, or unfairly maligned. And why? Simply because they have stood accused of not being ‘real’ MGs.”
The MG Car Company was formally established in 1928 but its origins go back to 1902 when William Morris, a young cycle mechanic, set up a business called both The Oxford Garage, and Morris Cycleworks. Morris’s business grew and in 1913, he produced his first motor car, and re-named his business The Morris Garages to reflect its new role as a distributor of Morris Cars. In 1922, Cecil Kimber was appointed general manager of the The Morris Garages business, which was still owned by William Morris.
In addition to selling standard Morris cars, Kimber began to offer modified versions of the base Morris. The first of these, in 1922, was a Chummy model on a shortened Morris Cowley chassis, and the first ‘special’ saloon was produced in 1924. It was an upmarket version of the standard contemporary Morris Oxford saloon and offered buyers extra creature comforts including silk curtains on the windows, luxurious upholstery, thick pile carpets, a parcel net, a ventilator in the roof and an interior light. Clausager notes that the year 1924 is generally thought of as the year when MG was born, and the year when the MG company name and distinctive octagonal badge was first used.
MG saloons were built during the 1920s and 1930s, along with open cars. In the years prior to the outbreak of the Second World War, MG continued to offer their popular range of ‘Midget’ sports cars, supplemented with three larger saloons and drophead versions, the S, V and W models. The WA had an engine capacity of 2,561cc, the SA 2,288cc and the smallest of the range, the VA, had an engine of 1,548cc.
The next development to the range was to include one more saloon, of smaller engine capacity than the VA, and this is where the MGY makes its appearance. The Cowley design office turned to Morris’s 10/4 Series M saloon, which was introduced during 1938, and the smaller Eight Series E as the design base for this new model, which was called the MG One and a Quarter Litre (Series Y).
A prototype Y Type was constructed in 1939 with an intended launch at the Earls Court Motor show the following year. However, due to the onset of the War, the company had to wait a further eight years before production could commence. The new car would feature an independent front suspension layout designed by Alec Issigonis (later to become famous for designing the Mini, in 1959) and Jack Daniels (an MG draughtsman). Independent front suspension was very much the latest technology at the time and the Y Type became the first Nuffield product, and one of the first British production cars, with this feature.
Gerald Palmer was responsible for body styling and he took a Morris Eight Series E four-door body shell in pressed steel, added a swept tail and rear wings and a characteristic MG bonnet with an upright grille. The MG 1¼ Litre Saloon retained separately mounted headlights at a time when the Morris Series E had its headlamps inset into the front wings, and the Y had a separate chassis under its pressed-steel bodywork, even though the trend in the industry at that time was towards ‘unitary construction’. A tourer version of the Y was introduced at the 1948 Earls Court Motor Show.
In keeping with MG tradition, the MG Y Type had a high standard of interior finish, featuring seats faced in leather and extensive use of wood trim, including a full width burr walnut veneered dash.
In 1952, the MG Car Company updated the Y Type and an improved model, designated the YB, was launched. (The first version of the Y is now often unofficially referred to as the YA, to differentiate it from the YB.) The YB had a new Lockheed braking system and a more modern type of back axle. The road holding was also improved by the introduction of 15 inch wheels – the Y and Y/T had 16 inch wheels.
The YB also had an anti-roll bar fitted to the front of the car and better dampers were fitted. Externally both models looked much the same, the main difference being the depth of the rear guards on the YB to accommodate its smaller wheels. A new range of colour schemes was also offered to YB buyers.
When production ceased in 1953, a total of 8,336 Y Types had been produced – 6,151 Y models, 1,301 YBs and 884 Y Tourers.
The Story of Y3498
Our featured example is a Y model, built in approximately 1948. After a three year ground up restoration, it is now in a condition very close to original, including the colour (Autumn Red).
Despite the current owner’s best attempts, the history of this car is largely unknown. It was purchased through a well-known internet auction site in 2009, but the vendor knew very little about the car’s history, as he had only purchased it a matter of weeks before selling it on. Contact with the prior owner wasn’t very helpful in tracing the car’s history either – he had purchased the car from a used car yard in Geelong some years previously, but that yard no longer exists.
In 1988, UK enthusiast John Lawson published an excellent reference book called ‘MG Y Type Saloons and Tourers’, and this book shows that Y3498 was in Victoria at that time. Mr Lawson subsequently advised the car’s current owner that his records showed that it was owned by a Mr C K Curtis, but finding this gentleman somewhere in Victoria some 20 years later proved to be a futile task.
A windscreen came with the dismantled car and it still had a registration sticker on it which showed the engine number (XPAG SC133500), which matched the car’s engine and brass plate. The registered number was shown as OH841 and the registration expired on November 11 1970. Victorian motor car registration details were destroyed by the authorities in Victoria some years ago, so these details were of no value at all, other than as academic interest.
Restoration story
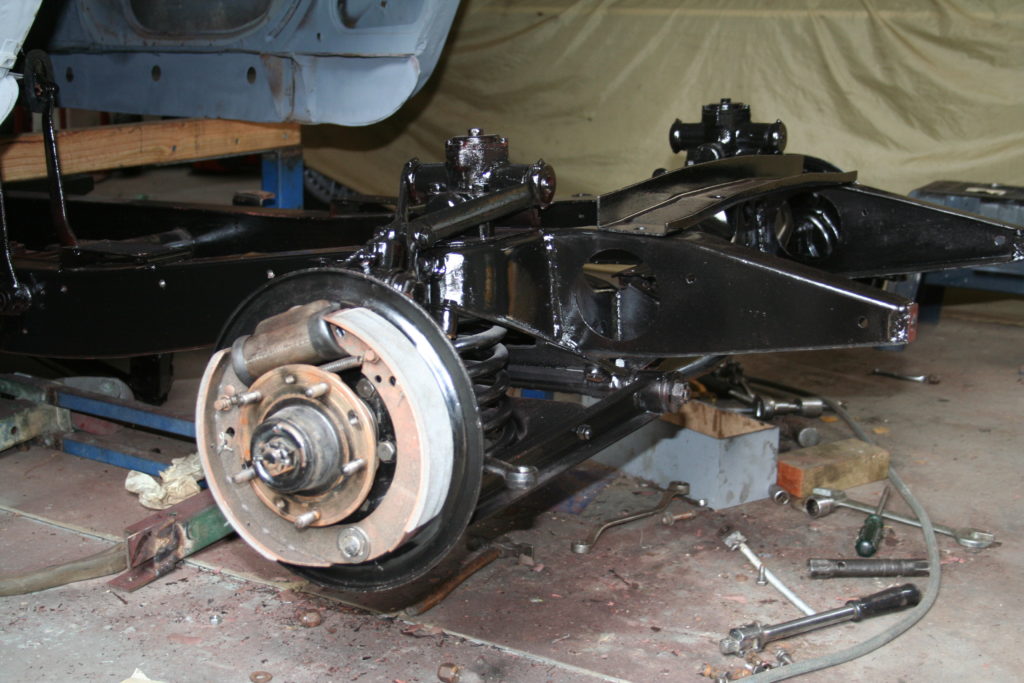
When purchased, Y3498 had undergone some restoration. The body and chassis had been separated and the chassis had been sand blasted, painted and rebuilt to a high standard. A sheaf of old invoices dated 2003 documented the purchase of many chassis and brake parts – wheel bearings, swivel pins, wheel cylinders, rubbers, bushes, machining of brake drums and shoes and the like. Fortunately, the braking system had not been filled with fluid and everything was well protected with rubber grease, so sitting for six years had not affected these components in any way.
Just to be on the safe side, the chassis was dismantled for inspection and then reassembled. At the same time, the old brake lines were removed and discarded, and were replaced with brand new ones. About $50 for a roll of material, and a couple of hours work to bend up and double flare the ends, was considered cheap insurance.
The independent front end was also removed, dismantled, checked, repainted and reassembled. As noted in the introduction, this was an Alec Issigonis design providing independent front suspension and rack and pinion steering that was used in MGs, basically unchanged, for 30 years until 1980 when the production of MGBs ceased.
Body Shell
Although the chassis did not require a great deal of work, the body was a different story altogether.
Some work had been done but it appeared that the total job proved to be beyond the skills of the previous owner/s. The shell appeared to have been stripped and cleaned, and painted in acrylic primer surfacer some years previously. This material, being porous, did not protect the base metal very well – it was removed very easily, with paint stripper and a wash with paint thinners, to reveal a healthy rust bloom over the whole surface.
Removing the primer also exposed quite a lot of body filler, some of which was quite thick where a double skinned panel thwarted amateur panel repairer attempts to fix some deep dents, particularly in the roof, which appeared to have been damaged by a low hanging tree branch at some time in the past. All this filler was removed in order to repair whatever perils existed beneath it. And there were plenty!
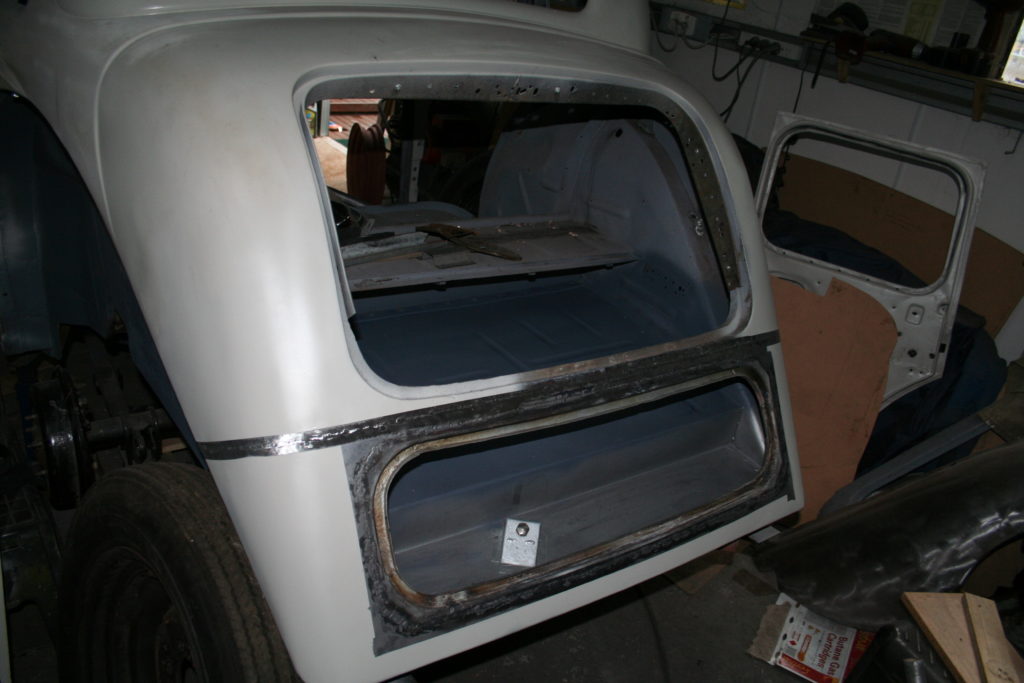
By far the worst problems were in the rear where the spare wheel compartment floor had completely rusted out and was missing. It is easy to see how this area could have become so badly affected by rust. The sunroof has a drain channel around the frame, and water is taken from this channel by four flexible hoses in the roof space, hidden by the head lining – at the front, these tubes are threaded down the windscreen pillar, emerging through a hole in the sill near the rear of the front guard, to discharge collected water onto the ground under the car.
The rear tubes are also routed along the roof line, above the rear quarter light, down the rearmost pillar and through a hole in the body above the back wheel. The hoses appear to have been made originally from a thin walled rubber or similar material which, over the years, became brittle and eventually cracked and broke – instead of discharging water onto the road, it finished up in the car’s spare wheel compartment or the floor under the back seat.
Y3498 required extensive work to rebuild the back section of the body. We called on the services of Andrew Hitchcock, a skilled panel man with years of experience on British classics, and he amputated what remained of the lower 40 cm of the tail of the car. With nothing original to reproduce, careful measurements were made of the floor and rear end of a friend’s Y, a mock-up was made from 3mm MDF board, and Andrew fabricated a completely new boot floor panel using the mock up as a guide.
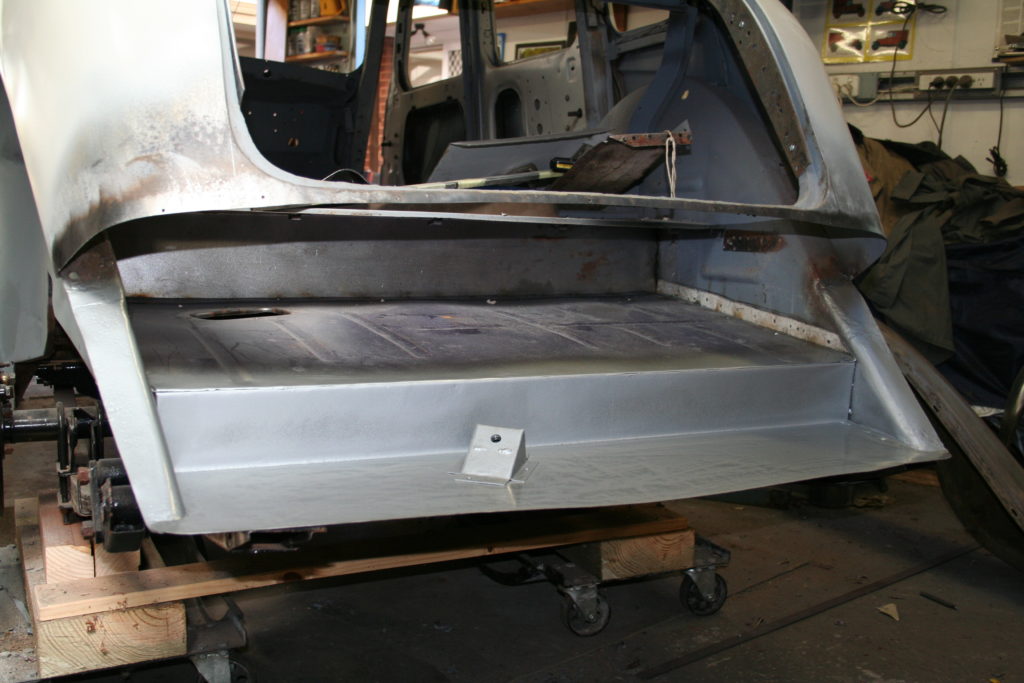
Once the floor was welded into place, Andrew was able to fabricate the new outer skirt which was skilfully gas welded to the body after temporarily ‘pinning’ it into place and fitting up the rear guards to check for fit and alignment.
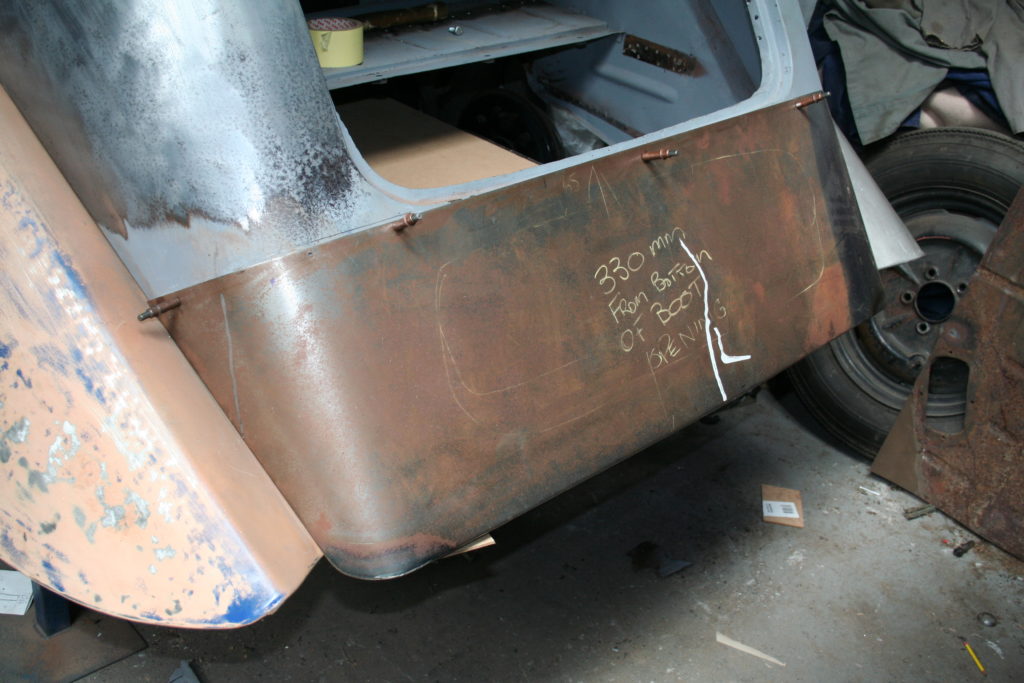
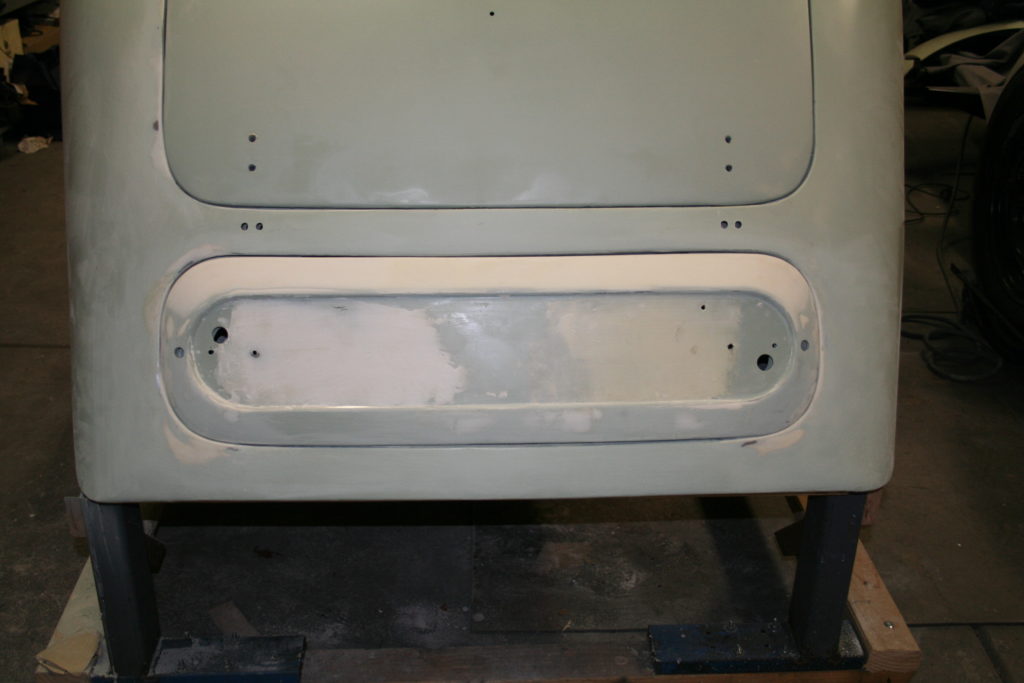
The final task of this part of the job was to make the spare wheel aperture. We simplified this task by acquiring a hole surround from a wreck, to avoid the need to replicate the complicated small channel around the hole itself.
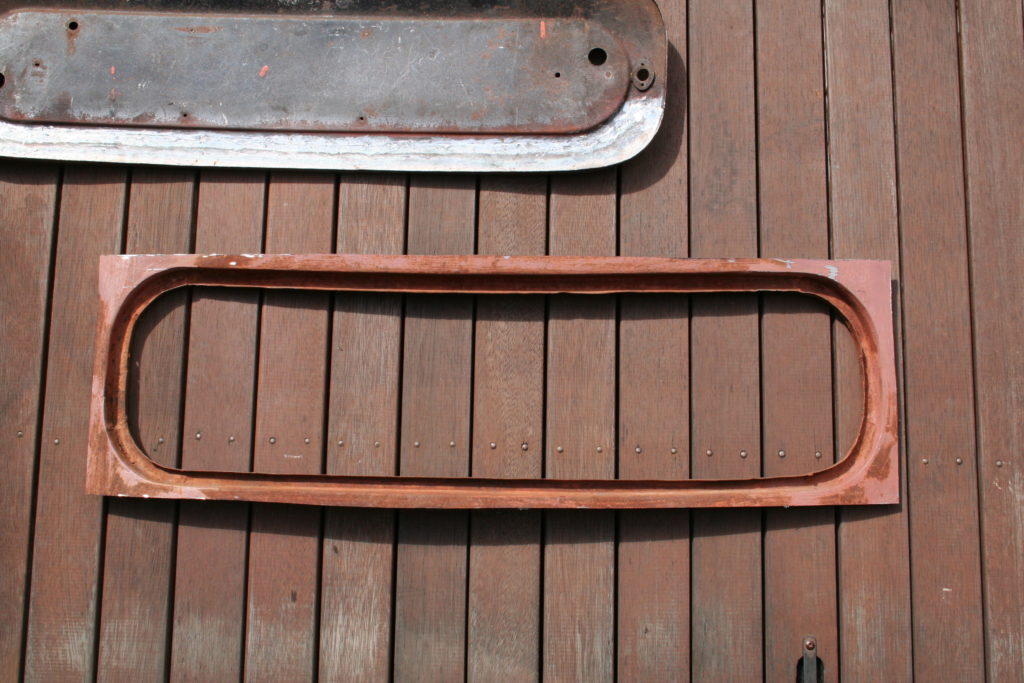
Needless to say, after all this work, great care was taken to ensure the correct placement of the spare wheel aperture, using another MDF pattern as a guide – never has the old adage ‘Measure twice and cut once’ been more rigorously adhered to!
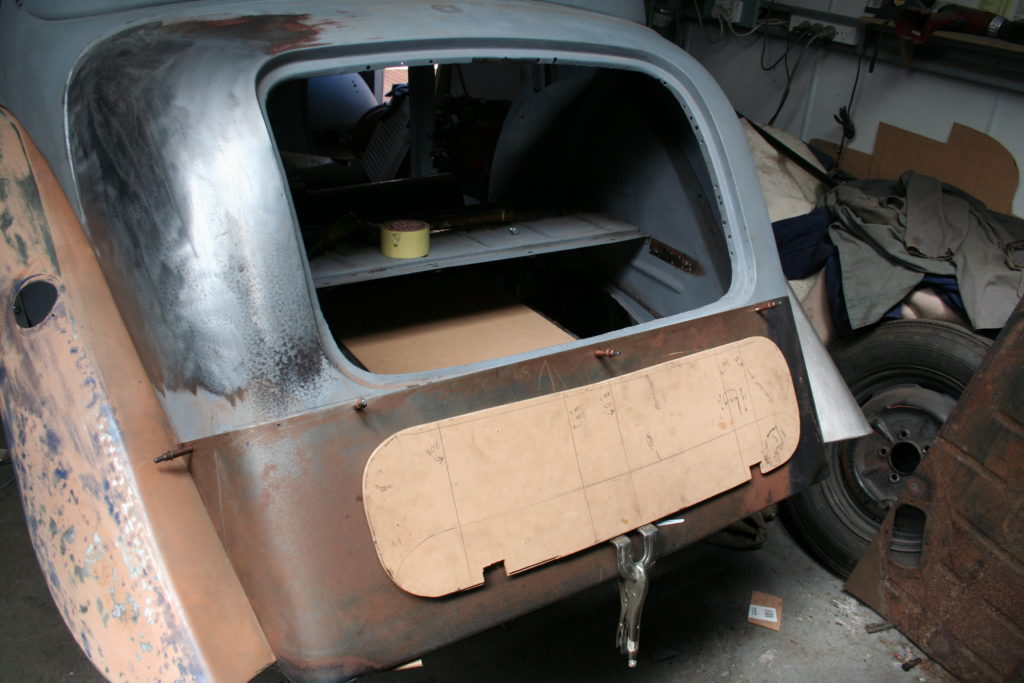
Care was taken to ensure the correct placement of the spare wheel aperture, using an MDF pattern as a guide 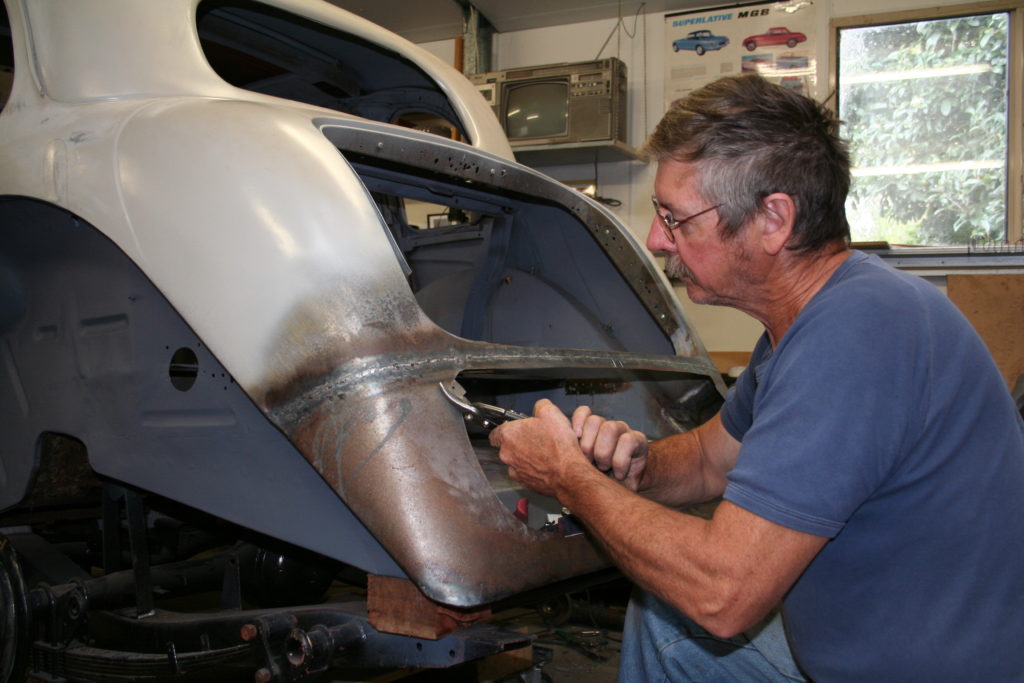
Here, Andrew gets to work on the nerve-wracking task of cutting to the exact shape of the aperture frame, which will be butt welded to the new rear skirt.
The aperture surround is held in place temporarily …
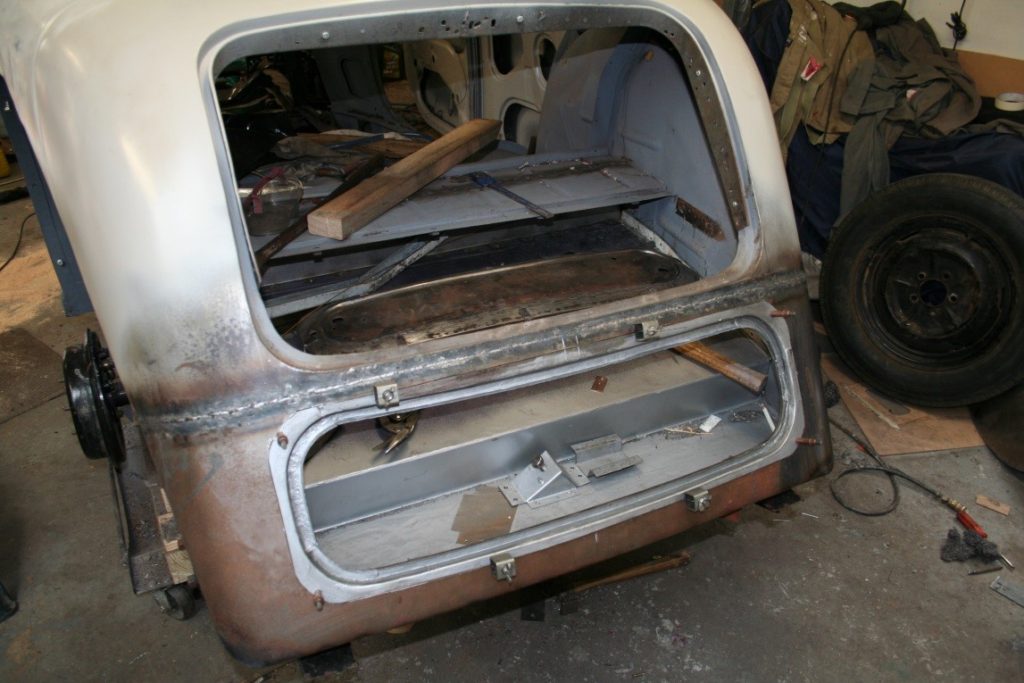
…before being gas welded into place.
After the welds were dressed and finished, the metal was de-rusted, de-contaminated, etch primed, filled, undercoated etc and made ready for primer and final coats.
The rest of the body was treated with the same level of care and attention over several months. Space limits the amount of detail on an explanation of minor repairs taken on door panels, running boards, guards and other components that make up the whole.
The boot lid, for example, was rusty and necessitated the removal of the skin from the frame, to repair rust holes along the bottom edge of both parts (the bottom 75mm of the boot lid skin was cut off and a new section welded in – the spare wheel locker cover also received the same treatment).
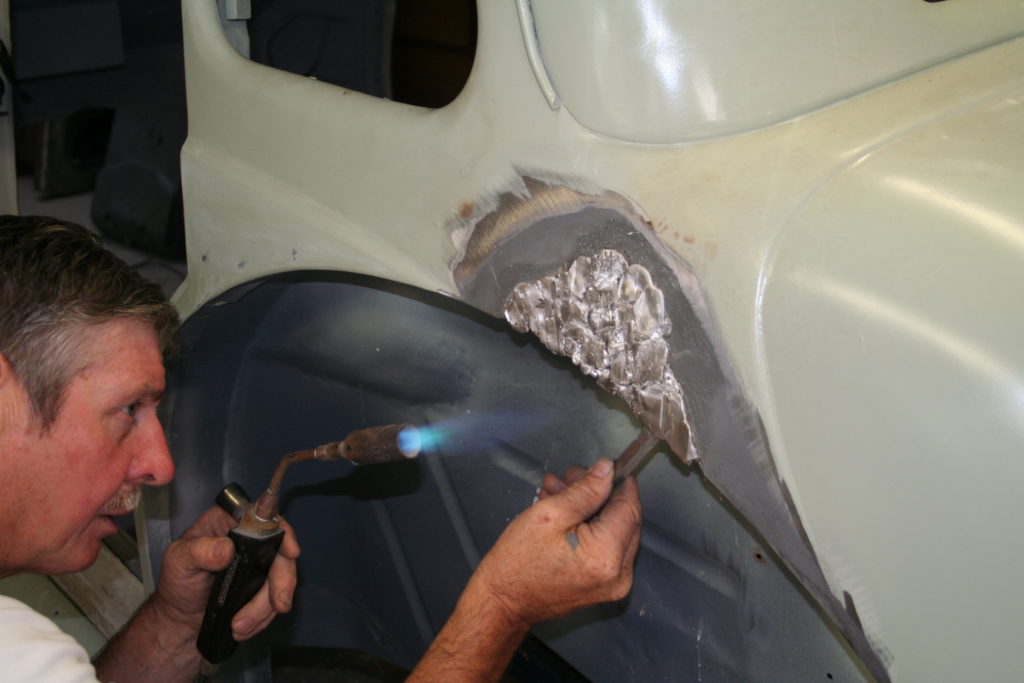
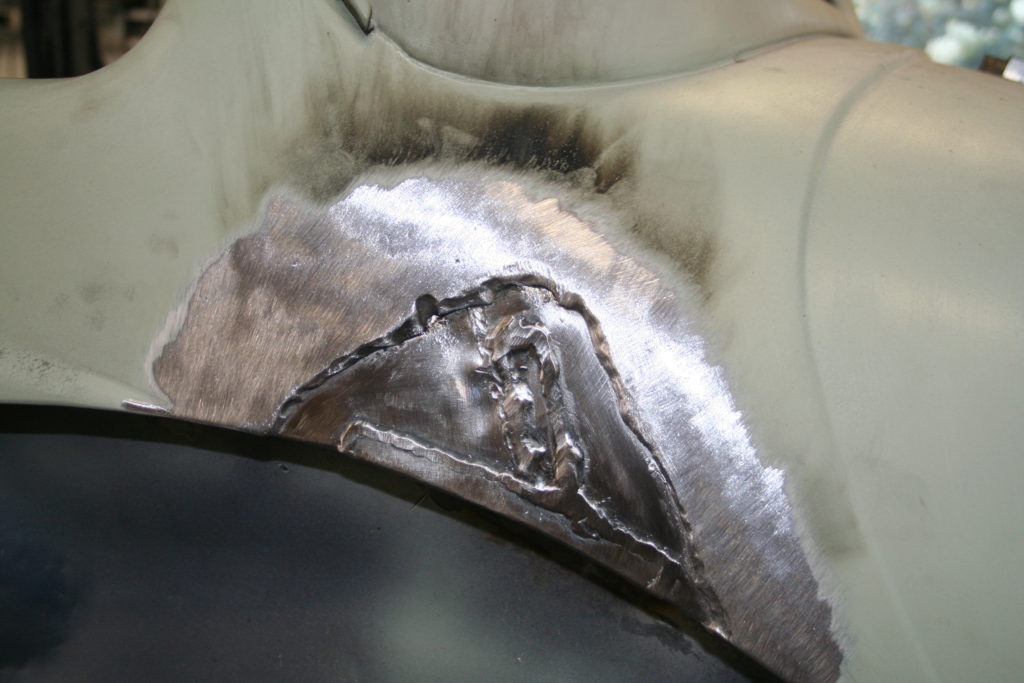
One task that is worth examining in detail, is a repair to the body shell where two panels were roughly lap joined in the factory. This joint was filled and levelled with lead, also factory finish, in places about 10mm thick. Lead filling has become something of a lost art with the development of modern fillers, and a brief explanation of this process may be of interest to readers.
Andrew very helpfully pointed out that it’s a bit difficult to weld to lead, so proceeded to remove the filler with heat from a small propane torch, to expose the rusted steel underneath, which extended over the top of the inner guard. Small repair sections were made up and MIG welded into place.
After physically and chemically cleaning the repaired area, it was time to replace the lead filler. My Mum used to tell me that ‘cleanliness is next to Godliness’, a saying which is most appropriate when preparing an area for lead filling.
The first blobs of lead are pushed in to place directly from a stick of filler material. Careful application of heat softens the lead to a consistency that is similar to plasticine.
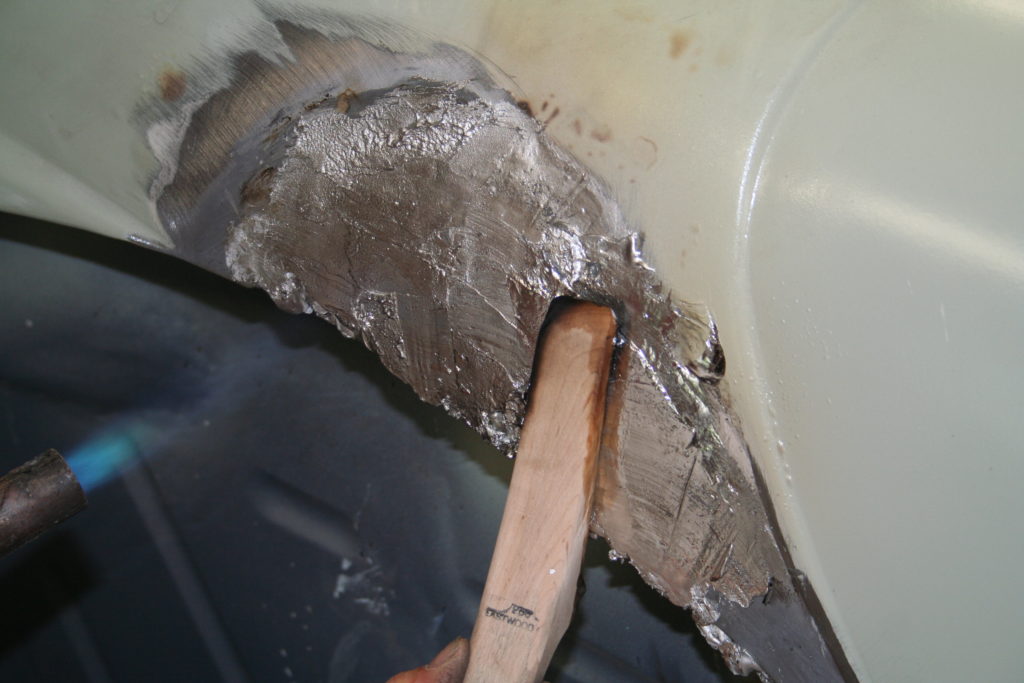
Once the repaired area had been roughly filled, it needed to be smoothed and shaped to match the original contour of the body. This was done using a wooden paddle lubricated with beeswax. Again the amount of heat to be applied was critical, especially on a vertical surface like this – we needed the lead in the repaired area, not in a puddle on the floor!
After dressing with a body file, the filled area was now ready for ‘normal’ paint preparation and finishing.
Lead loading and dressing the bodywork 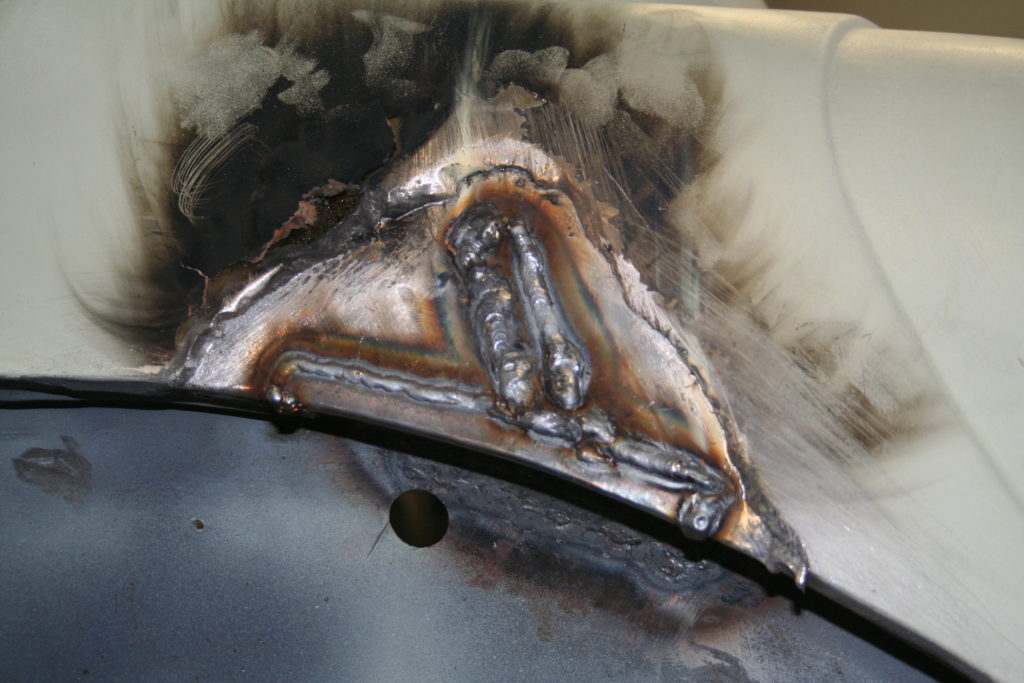

Like many of its contemporaries, the MGY body is made up of many pieces – there are, in total, 23 parts that need to be individually repaired and painted. If that seems a bit over the top, check my arithmetic … one body shell, four doors, two running boards, four wings, four bonnet panels, one boot lid, one spare wheel cover, one front valance panel, one sunroof, four wheels.
At times during the project, one wondered if/when it would ever be finished, especially with a car like Y3498 which required some work to just about every one of those 23 parts.
Lots of space is required for a restoration project of this type especially when the body is separated from the chassis. After working for days on a component part, the semi-finished or finished part needs to be stored carefully – there’s little worse that damaging a nicely finished panel and scratching or denting it, and having to start again.
Having a tolerant partner is an essential – my long-suffering wife has given up objecting to the storage of painted components on the dining room table!

Perseverance is an essential in a project of this nature. Rather than taking on the project as a whole, it’s best to view it as a series of smaller projects – my advice is to nibble away at the project one panel at a time … a mudguard this week, a door next week.
The final challenge was to reassemble all the freshly painted bits that make up a car. It sounds trite to say that if it all came to bits, it should all go back together easily enough. Fine, if that’s the way it was, but some of the bits may have been replaced, others have been repaired and bolt holes that once lined up may now miss by a millimetre or so. It pays to do a trial assembly before parts are painted – that way, if there are any re-alignment problems, it’s much easier to fix when the parts are only primed. It’s extra work that may save a lot of time.
In Part 2 we tackle the engine, interior and Jackall system, read here.